R2RML/Database Mediator
| Type | Description |
|---|---|
 | Interfaces with relational databases supporting the SQL standard. |
Select the R2RML/Database icon to start creating a new Mediator.
Select a Database Schema
The R2RML/Database Mediator Wizard presents a list of Database Connections that you can use for the Mediator.
Click on the arrow next to the database type and database name to see the list of schemas in the database.
Select a schema and click Next to continue to Customize the Mediator.
You are only allowed to view the databases, schemas, tables, views, and columns that the Database Connection allows.
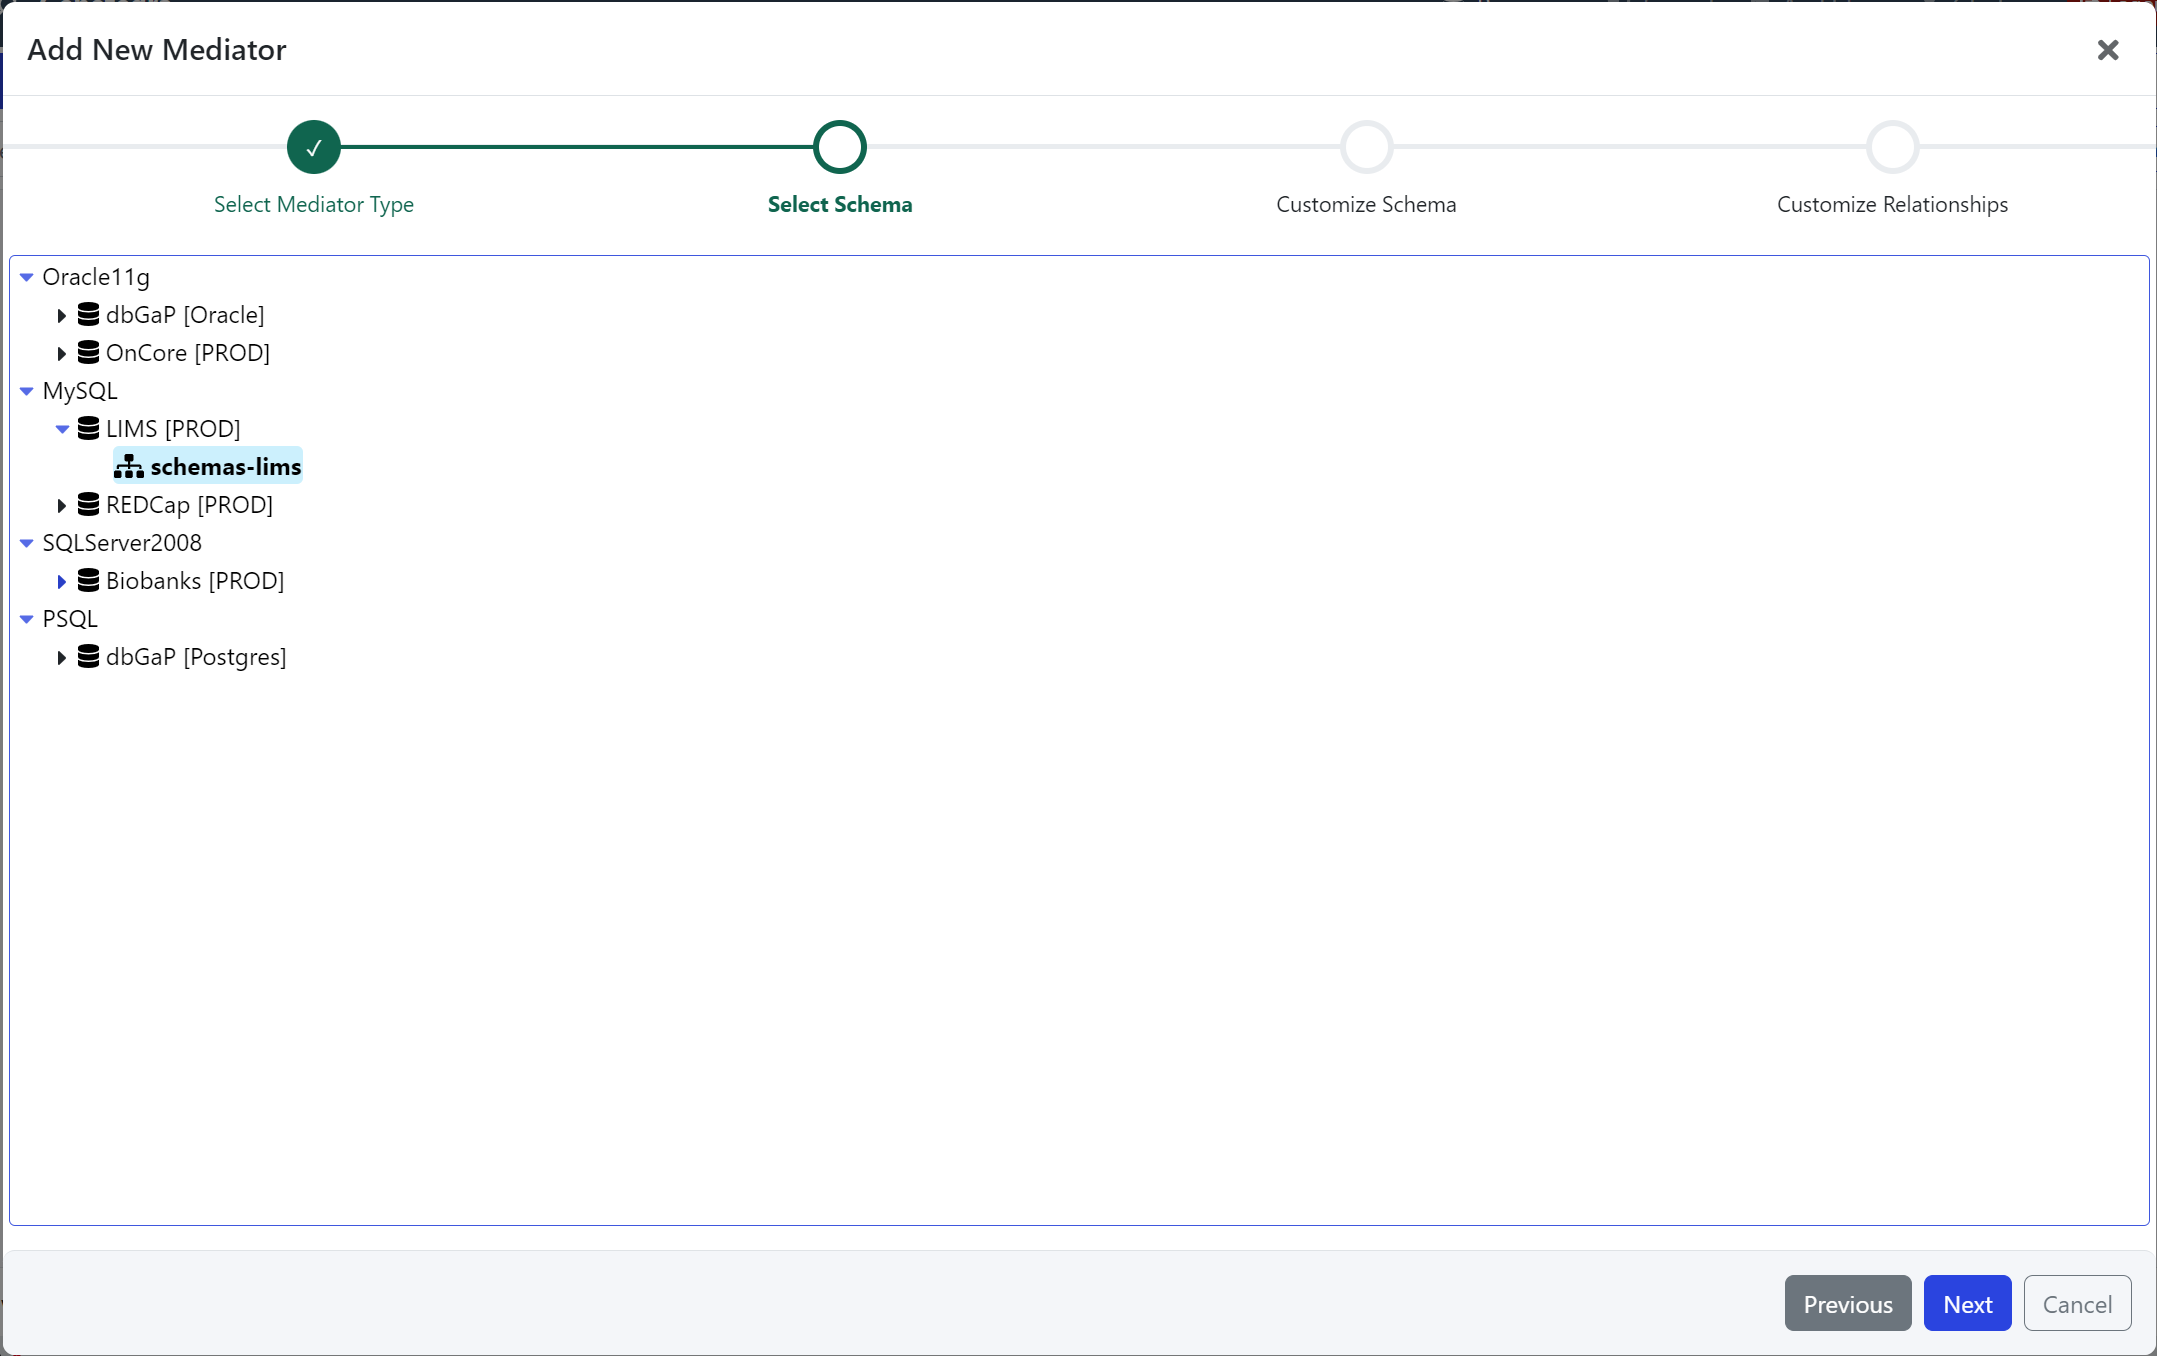 The R2RML/Database Mediator wizard shows all of the Database Connections and schemas that have been configured for the system.
Customize the Mediator
Once you've selected the database schema, you can configure the Mediator metadata and customize the mediator's underlying model.
| Field | Description |
|---|---|
| Title | Title of the Mediator |
| Description | (Optional) Description to help users find and understand the Mediator. |
| Tags | (Optional) List of tags that can be used to help users find and understand the Mediator. |
| Ontology URI | (Optional) Unique URI identifier for the Mediator and configures the URI prefix that is used to define the Mediator's properties. Automatically generated if not specified. |
| Ontology Version | (Optional) Version string or URI for the Mediator's Ontology that is used to track changes (versions) of the Mediator's model. Typically appended to Ontology URI. Automatically generated if not specified. |
Each Mediator is assigned a unique identifier. It is possible to create multiple Mediators with the same Title, Description, or Tags.
You cannot reuse the same Ontology URI for multiple Mediators. In this case, creating the Mediator will fail.
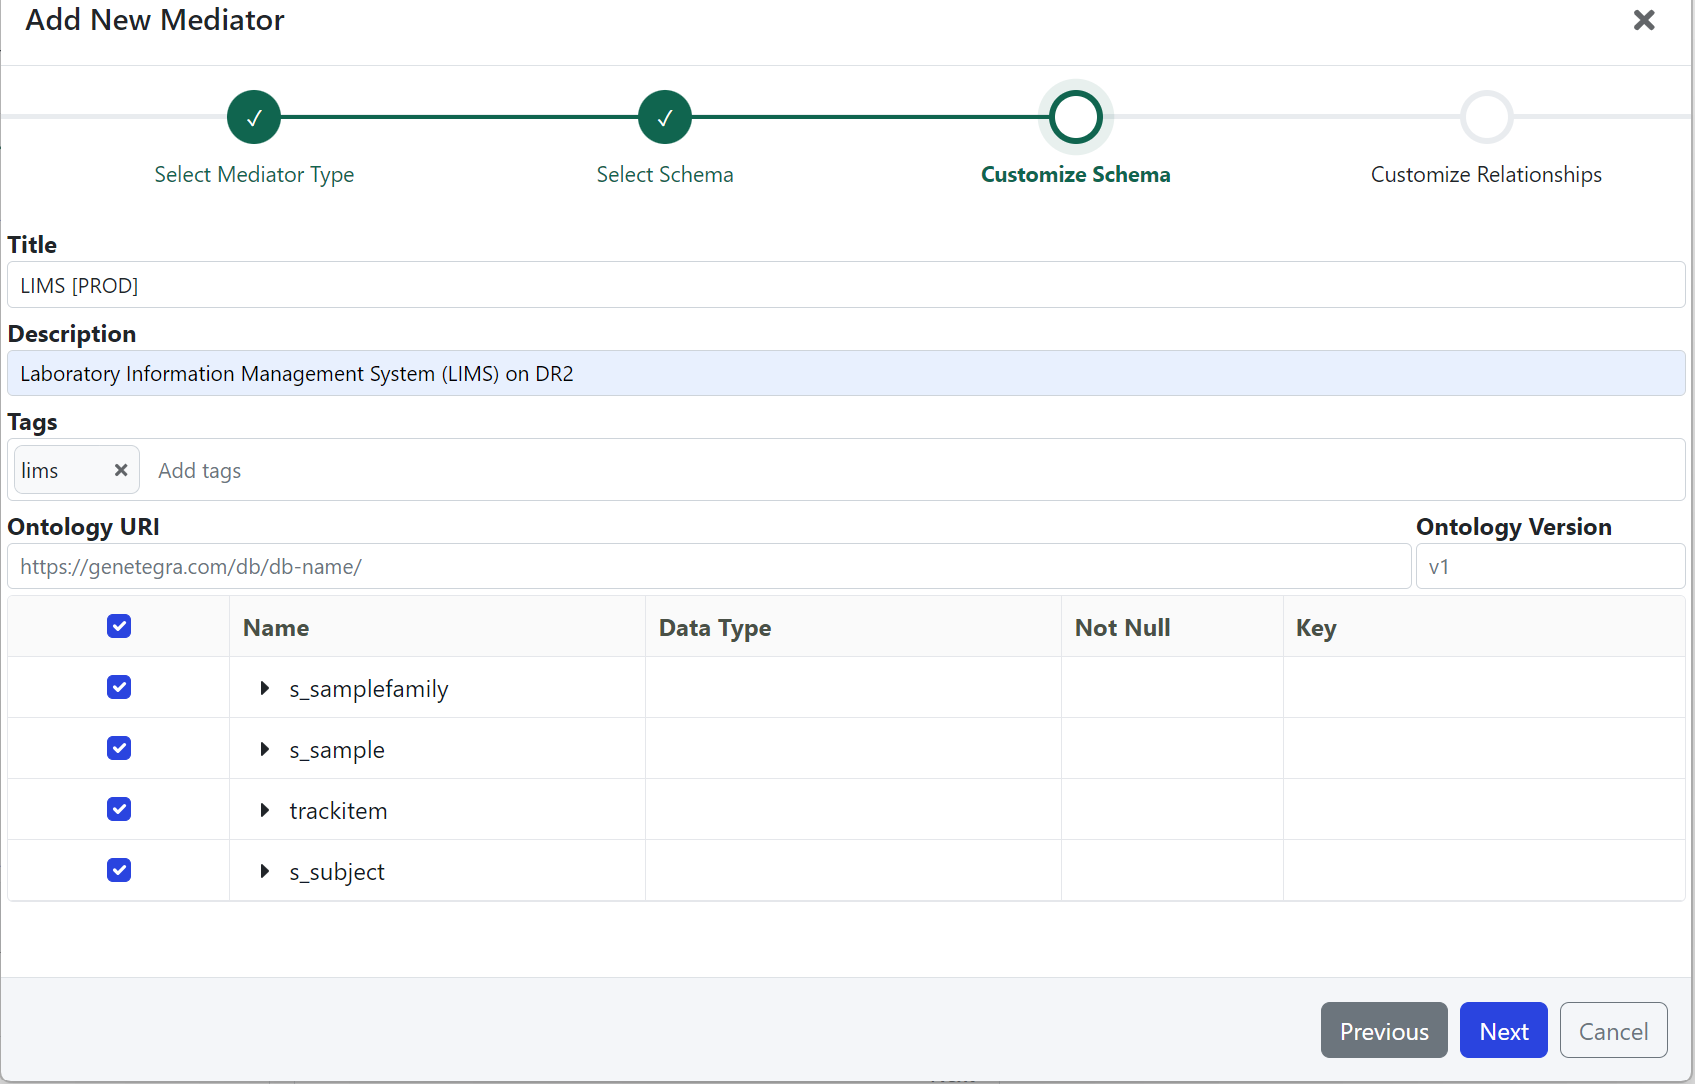 The Customize Schema step lets you specify the Mediator metadata and select which database tables should be included in the Mediator.
Customize the Schema
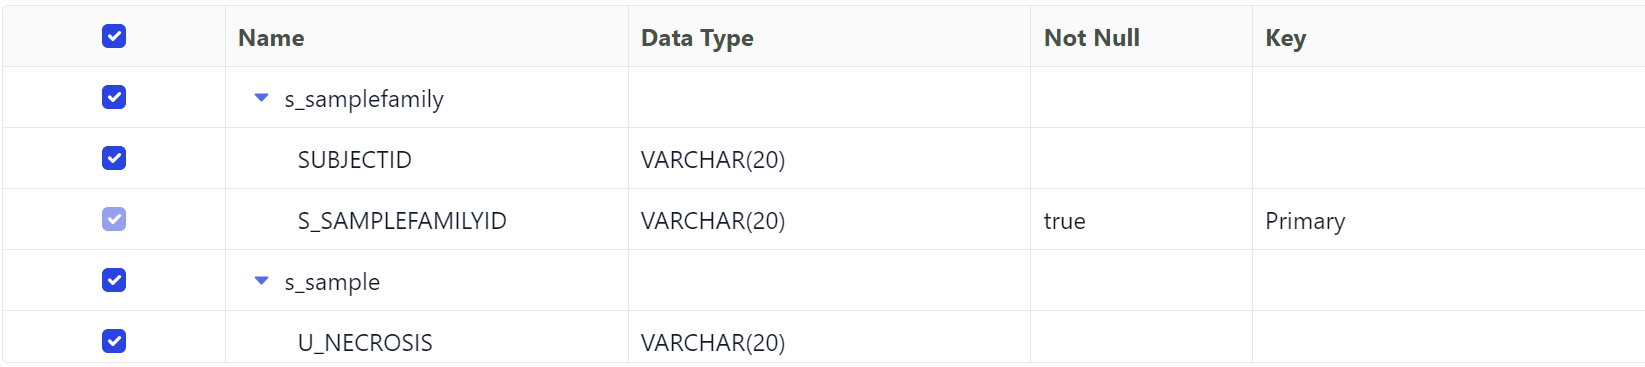
You can customize which tables and columns to include in the Mediator. Clicking on the arrow next to each table expands to view the table's columns. Use the ✅ check box to include or exclude tables and columns from the Mediator. If the table doesn't have a Primary Key, you may need to define a virtual key by selecting Key columns.
In this way, you can create a virtual view of the database.
 Customize Schema displays all tables and views discovered in the database.
Customize the Relationships
You can customize which relationships to include in the Mediator. By default, all foreign key relationships that reference the selected tables from the previous step are included. You can remove these relationships or Add new ones.
Adding a Custom Relationship is like adding a virtual foreign key constraint on the database.
| Field | Description |
|---|---|
| Name | Name of the virtual/custom Relationship. |
| Primary | Primary table of the Relationship. |
| Foreign | Foreign table of the Relationship. |
| Columns/Constraint | Select pairs of columns from Primary and Foreign tables to define the join condition. |
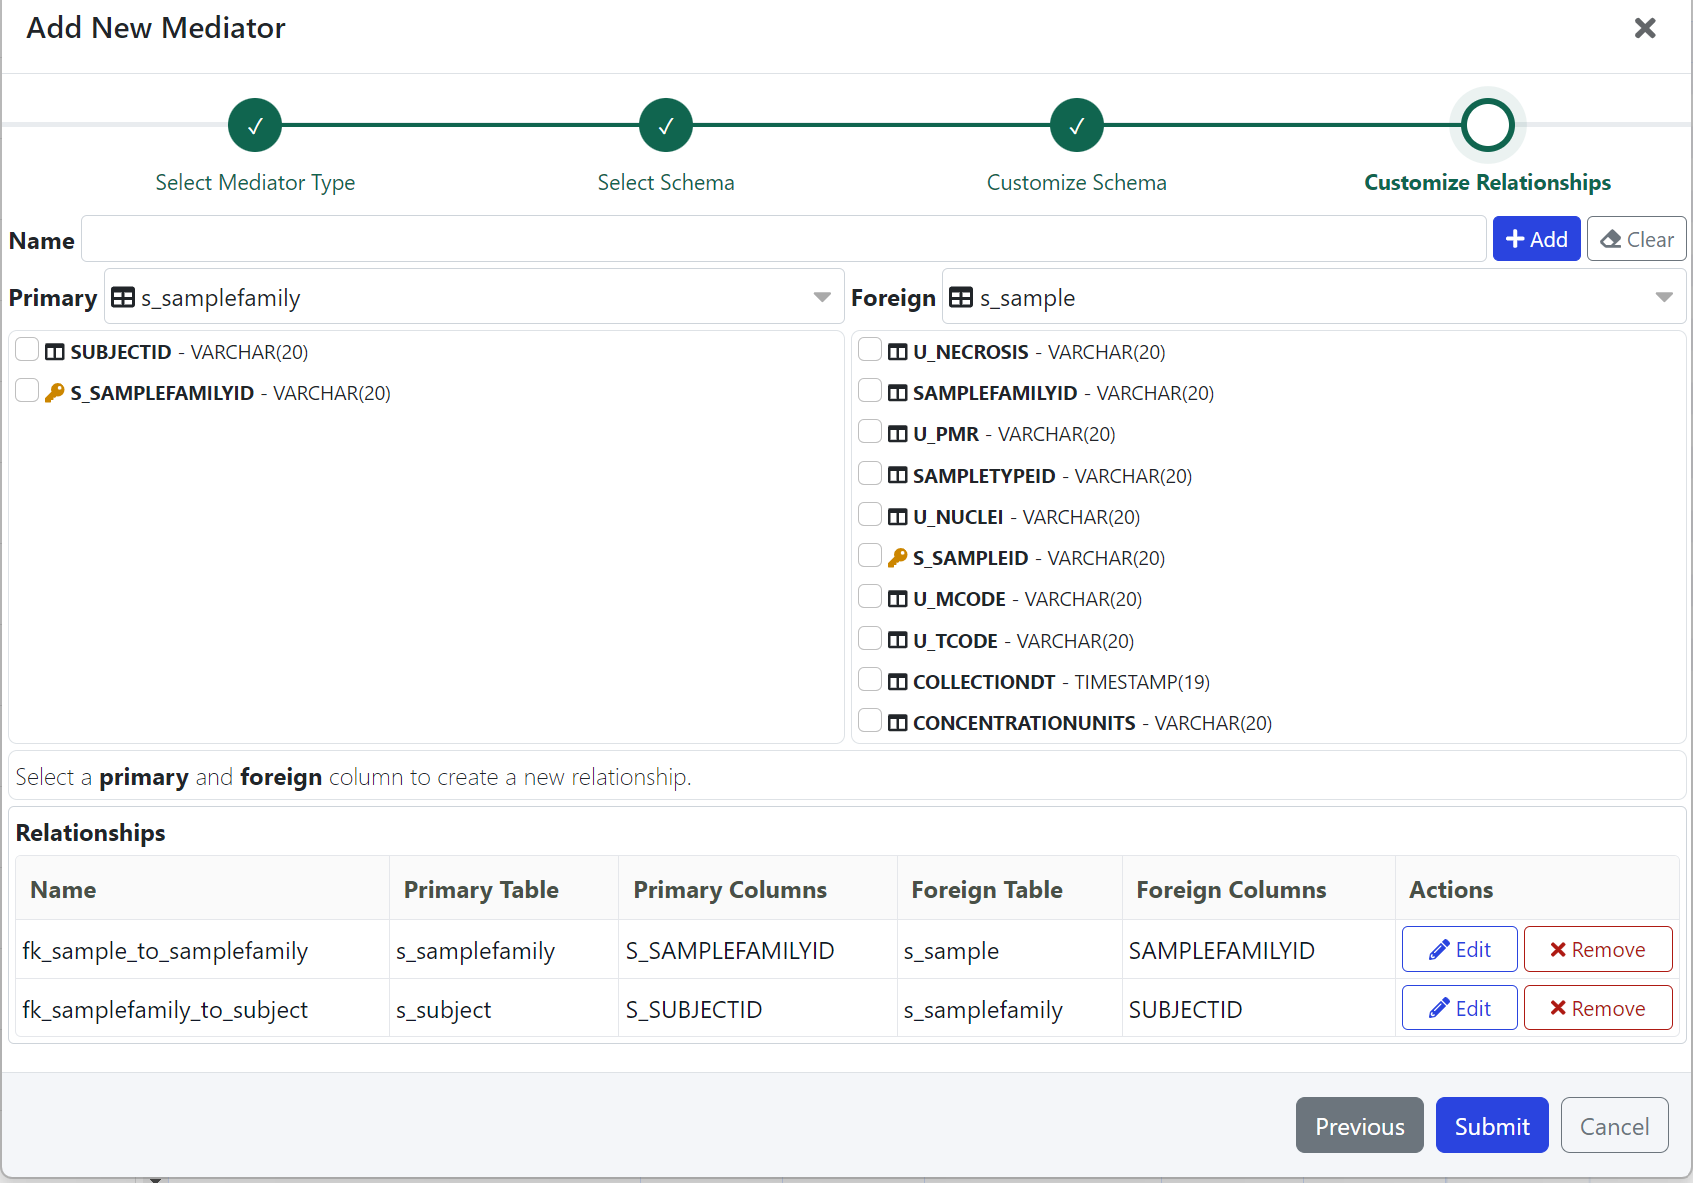 Customize Relationships displays all foreign key relationships discovered in the database that reference the tables selected in the previous step.
Defining a New Virtual Relationship
If possible, it is preferred to define or use existing database keys rather than create virtual relationships.
With database keys, the database system can define indexes and better optimize how queries are performed.
With virtual relationships, the query result will be the same, but it may take longer to execute. If possible, the columns chosen for the virtual relationship should have a unique index (primary key) defined in the database.
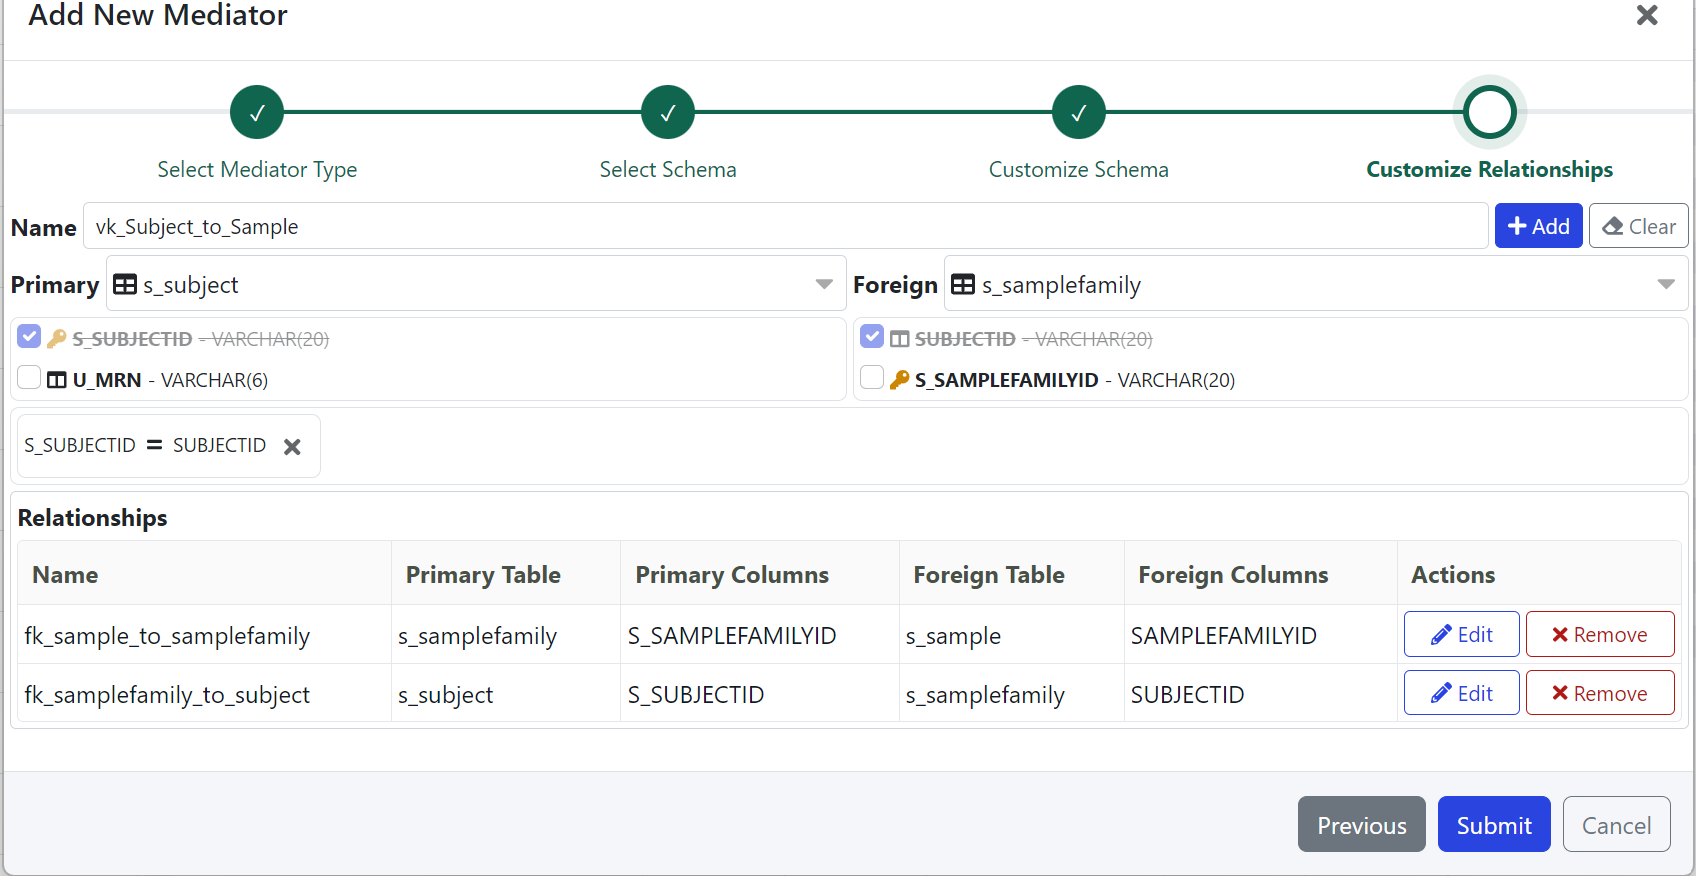 Adding a new Relationship lets you define virtual relationships that link a Primary and Foreign table together.
Submit the Mediator and Begin Querying
When your Mediator is ready to be created, click Submit.
GeneTegra will build and deploy the Mediator.
Once the Mediator has been created, you will be redirected to the Query Builder.